Niamh Doherty

A Simple Summer Salad, Side, or Snack

In Lunch, Snack, Supper on June 19, 2013 at 19:58

030

I don’t even know what to say anymore. I am officially the Worst Blogger Ever. In fact, let’s just forget I even blog, and that way we can all be pleasantly surprised when I actually do. Okay? Okay.

I threw this dish together earlier as I wanted something healthy but tasty to tide me over ’til dinner. It’s scarcely even a recipe, but it was delicious, and honestly I have Blogger Guilt and decided that my poor followers needed SOMETHING, no matter how haphazard.

It feels a bit silly listing the “ingredients” for this – it’s a dish of components more than anything else. It is ludicrously quick and easy to put together. You could, of course, roast, peel and chop your own beetroot. And if you wanted to make it even fancier, lay it all on a bed of mixed leaves, before adding some roasted peppers, chargrilled chicken, and balsamic dressing. This is not a so much a clear-cut recipe as it is a jumping-off point. I ate this as a quick snack on its own but it would make a lovely summer salad or side dish. I have one proviso, though, and that is: you do need to toast the pinenuts. A dish as simple as this,and with so few ingredients, needs to be perfectly balanced. The sweet, earthy beetroot contrasts with the soft, sharp feta, which in turn needs the crunch of pinenuts to tie it all together. If you lazily skip a step, it won’t taste as good. So, toast your pinenuts. And if the Laziest Cook In The World instructs you to absolutely do something, you know that it’s both necessary, and worth it.

Beetroot, Feta & Pinenut Salad

Serves 1; all measurements are approximate

Ingredients:

1 large cooked beetroot

30g of feta cheese, crumbled

15g of pinenuts

Method:

1. Put an unoiled pan on a low to medium heat. Add the pinenuts and toss occasionally. Keep a close eye on them as they burn easily. When golden, remove from the pan and set aside.

2. Chop the beetroot into bite-size pieces.

3. Lay the beetroot onto a plate or serving dish, scatter over the feta, and top with the toasted pinenuts.

Serves one.

033

A Romantic Raspberry Cheesecake, for Valentine’s Day…

In Dessert on February 7, 2013 at 23:16
060213771

…or, indeed, any day. This is so good you’ll want to make it again, and again, and again,

When I heard that  Avonmore were launching a new Dessert Cream, and running a competition to find the perfect Valentine’s Day dessert, I knew immediately that this treat was The One, so to speak. I can’t claim any praise for inventing this recipe – it was thought up by a very good friend of mine from college. We were so obsessed with this cheesecake that we would make it at least once a month, and devour it. Not only that, we’d also confer to see which of us had fewer housemates due home that night…fewer housemates meant fewer people to share it with, you see. Greed is good, my friends. Greed is good.

Aside from being utterly delicious, this dessert is ludicrously easy to make. It’s a no-bake, just-chill cheesecake – crushed biscuits are mixed with butter for the base, and the easily-whisked together topping is dolloped lazily on top. So far, so what? Well there are a few little twists lurking beneath the surface which take this simple sweet to the next level of lusciousness. Firstly, instead of sandy, everyday Digestives, we use Café Noir biscuits, with their sweet, coffee icing, as the base. Secondly, we add another layer of interest by spooning some crushed tinned raspberries on top of the biscuits, before finishing with the cream-cheese topping. The squashed, syrupy berries slowly ooze their delectable flavour into the biscuits, adding a sweetly-sticky, raspberry scent which ties the whole dish together. Anyone who’s ever eaten this has immediately asked for the recipe, which I think speaks for itself.

Finally, many of you will have noticed that my photo skills are rather lacking – I blame my camera but really I lack the requisite patience, and usually want to hoover up whatever I’ve just cooked instead of  having to delicately style and photograph it  – but that is thankfully about to change as I’ve collaborated with a photographer friend of mine, the wonderful Simon Curran of iamacosmonaut. With his infinite patience and mad camera skillz, Simon produced some truly dreamy food shots, which I am delighted to be able to share with you today. The styling was mostly done by yours truly – with some help and inspiration from a friend – and I’m thrilled with the results. I hope you enjoy them as much as we enjoyed shooting them, and hopefully this is the tip of the iceberg  for future collaborations!

060213801

Romantic Raspberry Cheesecake – serves 1-8

Ingredients:

For the base:

150g Cafe Noir biscuits (i.e. 1.5 packets)

75g butter, melted

For the topping:

200g creme fraiche

200g cream cheese

1 tbsp of Avonmore Fresh Dessert Cream

lemon juice

icing sugar

2 x tins of raspberries, either in their own juice or in syrup

Method:

1. Begin by crushing the biscuits, either in a food processor or the old-fashioned way, in a plastic bag and with a heavy implement. If using the processor, be careful not to process too much – you want crumbs, not dust.

2. In a bowl, mix the crushed biscuits with the melted butter until thoroughly combined. Press into the bottom of a 23cm cheesecake tin.

3. Take one tin of raspberries, open and drain off the juice. Plunge a fork into the tin and furiously whisk to roughly break up the raspberries. Dollop spoonfuls of the resulting muddled berries on top of the biscuit  base, smoothing and spreading as you go with the back of a dessert/soup spoon.

4. In a second bowl, mix together the creme fraiche, cream and cream cheese. Add a spritz of lemon juice, mix thoroughly and taste. If it’s a little tart, add a small amount of sieved icing sugar and whisk it in. Taste again and adjust as necessary.

5. To your cream cheese mixture, add the second tin of drained raspberries, and mix. You can either lazily marble it through, which looks very pretty, or stir more energetically for a uniformly pink-hued topping. Dollop on top of the be-raspberried base and refrigerate for 4 or so hours or, better still, overnight.

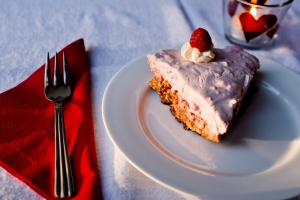
6. Serve with some fresh raspberries, pour over some Avonmore Dessert Cream, and commence gorging.

Some provisos: the topping is quite sloppy, so it does need to be made in advance, unless you’re happy with a cheesecake that doesn’t slice beautifully. No matter, it’s easier to get it done in advance anyway. Secondly, if using regular single cream, just use 3/4 of a tablespoon, as it’s thinner than the Fresh Dessert Cream I’ve specified here.

060213783

Nutella Cheesecake

In Chocolate, Comfort Food, Dessert on January 28, 2013 at 17:52

NUTELLA CHEESECAKE

Once again, I’ve been neglecting my blog, and my readers, if there are any left. Consider this recipe a culinary white flag, and accept my apologies. Today’s nugget of deliciousness comes to you courtesy of the inimitable Nigella Lawson, and is featured in her newest book, Nigellissima. I caught the Christmas episode of the TV series cacompanying the book, in which she suggested serving this cheesecake as part of an Italian-inspired feast, and I was smitten. I adore hazelnuts and am obsessed with chocolate; in short, I had to make this.

Many people presume that making a cheesecake is a daunting affair involving waterbaths, dangerously liquid fillings and all manner of kitchen trickery, but this honestly couldn’t be easier. There is no baking involved – you simply throw the ingredients for the base into a food processor before nonchalantly pressing it into a tin and dolloping a cream-cheese and Nutella mixture on top. Honestly, the hardest part is coaxing the surprisingly semi-solid Nutella out of the jar. Well, that, and not eating the whole thing yourself…

I knew once I’d licked the filling off the beaters while making this that I was onto a winner, but to say it went down a treat at a recent get-together is an understatement. We didn’t bother with bowls but, rather primitively, attacked the unmoulded cake with spoons. Every time I walked past it in the kitchen another chunk had gone missing, and I was on the receiving end of an irate text from my friend’s husband the next day when he realised I’d taken the leftovers home with me.

Nigella instructs us to make the base in a food processor, but if you don’t have one – like me – don’t let that stop you. Simply melt the butter and 25g of Nutella together, and mix with the biscuits which you’ve crushed manually in a plastic bag – I like to use a large tin of tomatoes for the job, it’s wonderfully cathartic – before pressing into your tin and proceeding as normal. You can, of course, toast and chop your hazelnuts yourself, but seeing as Tesco have done all the hard work for you why not take advantage of it? You will be appalled at the amount of Nutella and cream cheese that goes into this, but life, as they say, is for living, and a small slice won’t kill you. It’s best served with a blob of whipped cream and a large dollop of self-control.

Nutella Cheesecake – serves 1-12

Ingredients: 

  • 250g digestive biscuits
  • 75g soft butter
  • 400g Nutella (at room temperature)
  • 500g cream cheese (at room temperature)
  • 100g hazelnuts (toasted and chopped – as discussed you can buy them already toasted and chopped)
  • 60g icing sugar

Method:

1. Break the digestives into the bowl of a  food processor, add the soft butter and a tablespoon of Nutella. Process until it starts to clump together. Add 25g of the hazelnuts and continue to pulse until the mixture resembles damp sand.

OR

Melt the butter and a tablespoon of Nutella together. Bash the biscuits in a clear plastic food bag with a rolling pin/tin of beans or tomatoes/your own crushing self-doubt until you have uniform crumbs. Add 25g of the hazelnuts into the biscuits and then stir in the melted butter/Nutella until it is thoroughly and evenly distributed.

2. Tip your biscuit mixture into a 23cm round springform tin and press down, using either your fingers or the back of a spoon. Put the tin in the fridge to chill while you make the topping.

3. For the topping, beat the cream cheese and sieved icing sugar together until smooth. Add the remaining Nutella and mix until combined.

4. Take the tin out of the fridge and dollop the Nutella mixture on top of the base. Spread evenly and top with the chopped, toasted hazelnuts. Put the finished cheesecake back in the fridge for 4 hours, or overnight.

Note: This is best served straight from the fridge as it will be easier to cut. I didn’t get to snap a photo of my own cheesecake so the picture above is from Nigella’s website. Credit is due to her photographer and most certainly not to me.